


Windows Server 2008 R2 Network/Scheduled Backup Procedure
.png?1532921592431)
This is simple guidance for windows server 2008 R2 Network/Scheduled Backup.
If you follow below guidance correctly, you can make proper schedule backup process.
A: Original server (windows server 2008)
B: Backup target server (any windows desktop)
- Create same Administrator account in both server.
same account name and password
- create remote share folder in server B and add created account read & write permission to shared folder
- In server A, go to server manager -> add roles and features -> role based or feature-based installation -> install windows server backup
- Go to windows server backup app, choose local backup ->
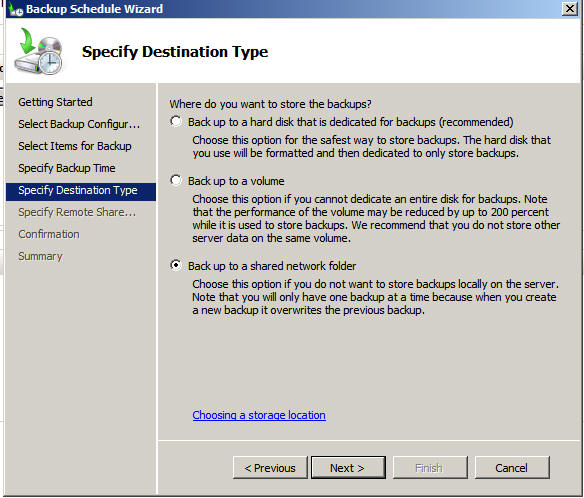
Backup schedule.
you can choose full server or custom. -> backup time and date -> choose back up to a shared network folder ->
type location of server B (ex) \\192.168.1.1\shared-folder-name
-> fill up username and password which you had created in both servers -> confirm details of backup schedule and close
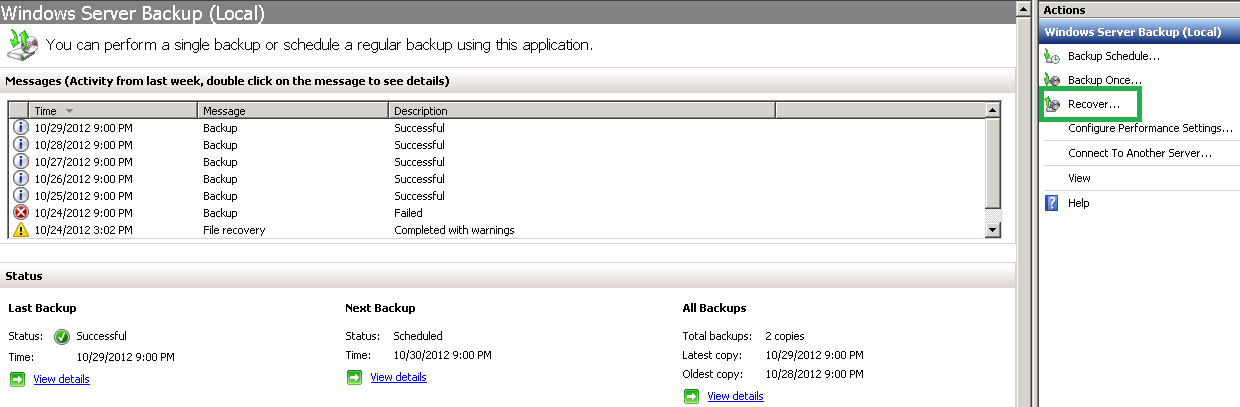
[Recovery]
- Go to windows server backup app, choose recovery ->
choose shared folder -> type location of server B ->
choose available recover data. you have to backup at least one time in shared folder in Server B
- You can see 5 options, choose what you want. Usually we choose Files and folders.
- Choose target folder for recovery -> type folder location.
This location is target folder in Server A.
choose one option among three, (1)create copies… (2)overwrite the
existing… and (3)Do Not Recover.. choose one option and next -> click recover